
Not
much news to report today. My brain disorders decided to attack last night and
still haven’t left so its been a quiet day. It’s quilt guild meeting tonight but
I’m skipping it……they are demonstrating hand quilting tonight and I do not hand
quilt nor do I have any interest in learning it – that’s why sewing machines were
invented – so we don’t have to hand quilt anymore. It looks amazing mind you and
I compliment the ones that do it…..and do it well….but it’s not for me. I did get
a few more cards finished this afternoon though.
I
really like how this card turned out even though it started out as an ‘oops” which
aptly stands for ‘Outstanding Opportunity Presented Suddenly’. A couple of weeks ago I posted a Christmas card done in light blue
for a challenge for a single layer card. I liked it but after looking at it for
a couple of days I got to thinking it might look better mounted on a solid blue
base but did I want to change it …..and then…..I turned it over! So glad I did
because for some odd reason I had blue and I think other little dots of ink all
over the back of the card. Decision made and I cut down the front of that card
and mounted it on blue and made a new card…..but the splattered back was still
there staring at me and daring me to make something out of it…..so I did…..and
here it is:
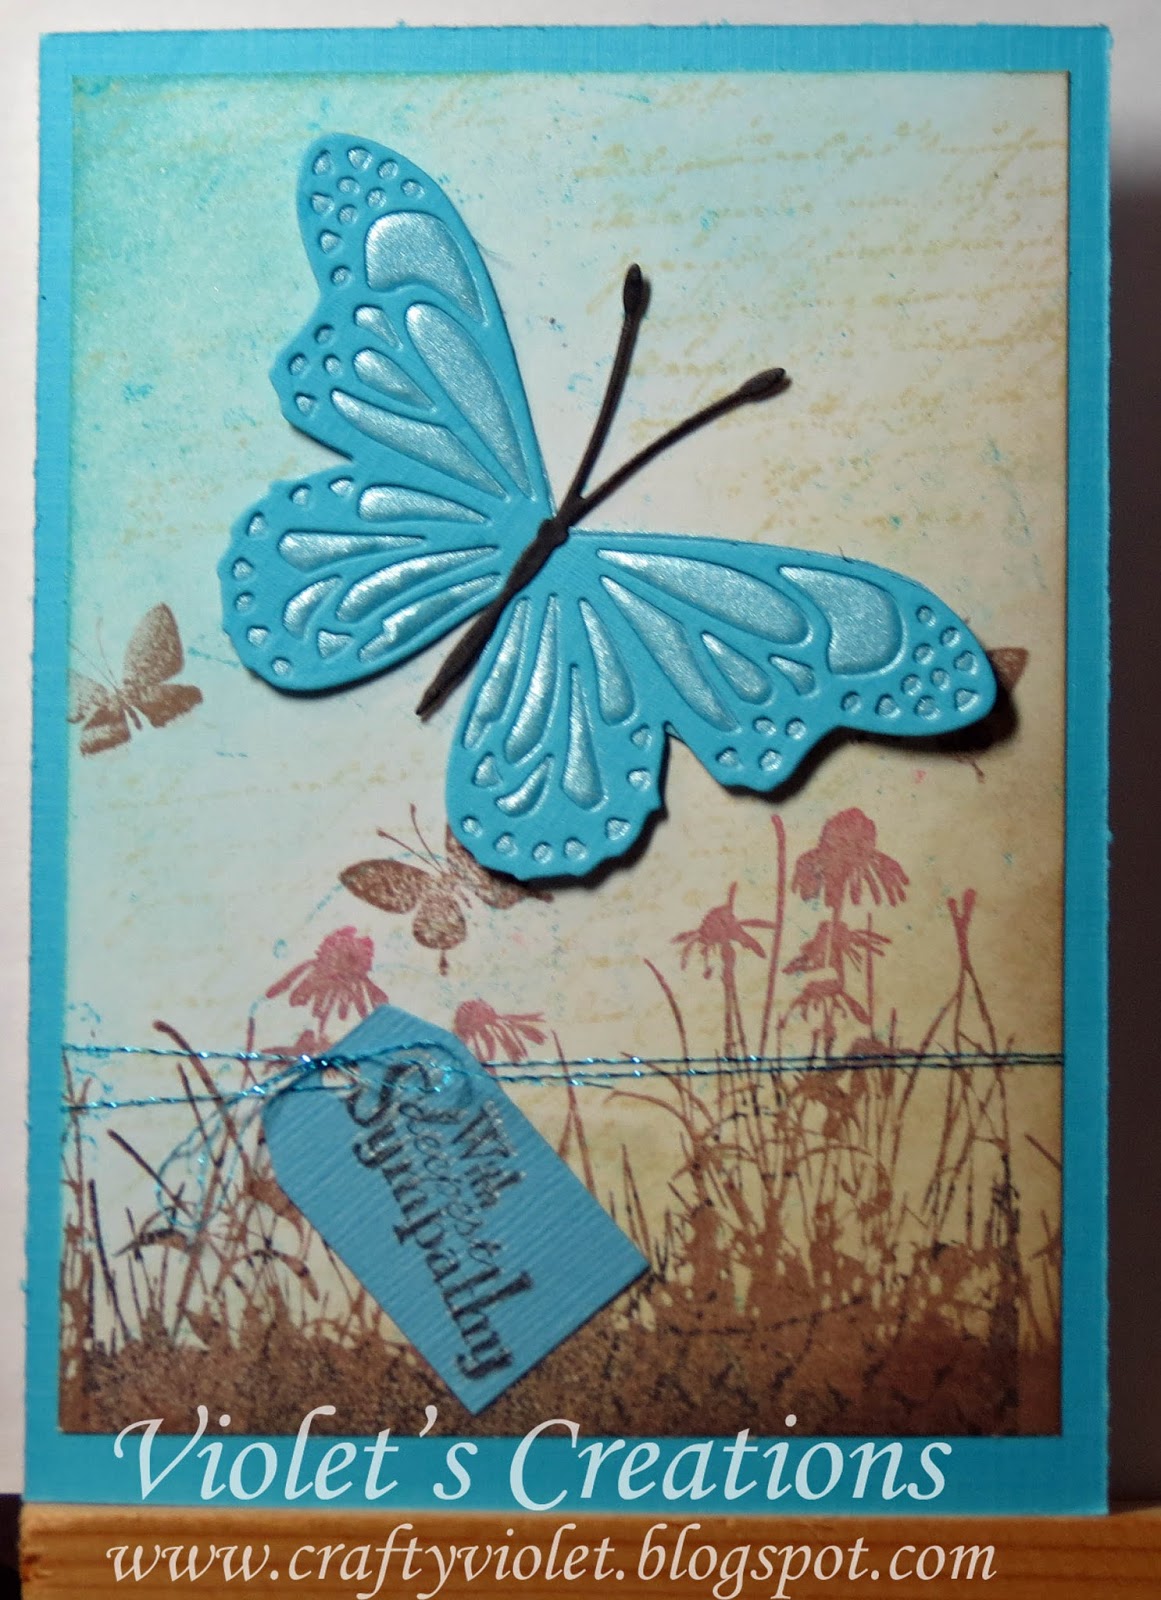
Then
I decided it needed a big butterfly for the focal image so I first die cut the
butterfly (Memory Box die) out of the solid blue cardstock and then I just
embossed it onto the shiny blue cardstock and cut out the butterfly. So when I
glued the top part onto the embossed bottom part, the inserts are embossed
against the flat top part and I’m sure some people will wonder how in the world
I was able to just emboss part of it – now you know.
The
tag was die cut with an old Cuttlebug die and the sentiments stamped twice –
once with silver; and then black over top of the silver but off-sided a bit. It
was held in place with some shiny blue thread. Then the entire piece was mounted
onto solid blue cardstock and then glued to a white card base – and I called it
‘finished’.
Don’t
forget, if you have a Pinterest account, you can now save any of my projects to
your account for future reference.
That’s
all for a Wednesday,
Cheers
Violet

No comments:
Post a Comment